
This guide provides a simple process for handling ticket refunds online, ensuring that event organizers can effectively manage customer requests. It outlines the steps necessary to navigate the internal platform, facilitating the filtering and processing of refunds or cancellations. By following these instructions, users can improve customer satisfaction through clear communication and timely refunds.
Tip: Cancel from the validation App.
You can cancel it at the door of the venue, from the Ticket Validation App, by accessing the red “Cancel” icon.
Once scanned and confirmed that you want to make the refund, the customer will receive an automatic email confirming the cancellation, and the refund of the ticket will arrive to your account within a maximum period of 72hs, depending on the bank.
IMPORTANT NOTE: In the event of a decision to deny access to the venue to a conflictive client, it is the organizer's discretion whether or not to refund the ticket.
1. Manage the refund from the internal platform, by accessing the event and entering the “sold tickets” section.
Click on the event on which you want to delete the ticket.

2. Click on “Sold tickets”, you can also filter with the customer's email address.

3. On the left side of the register, under “actions” a drop-down menu will open with different options.

4. Click “Delete/return ticket”.
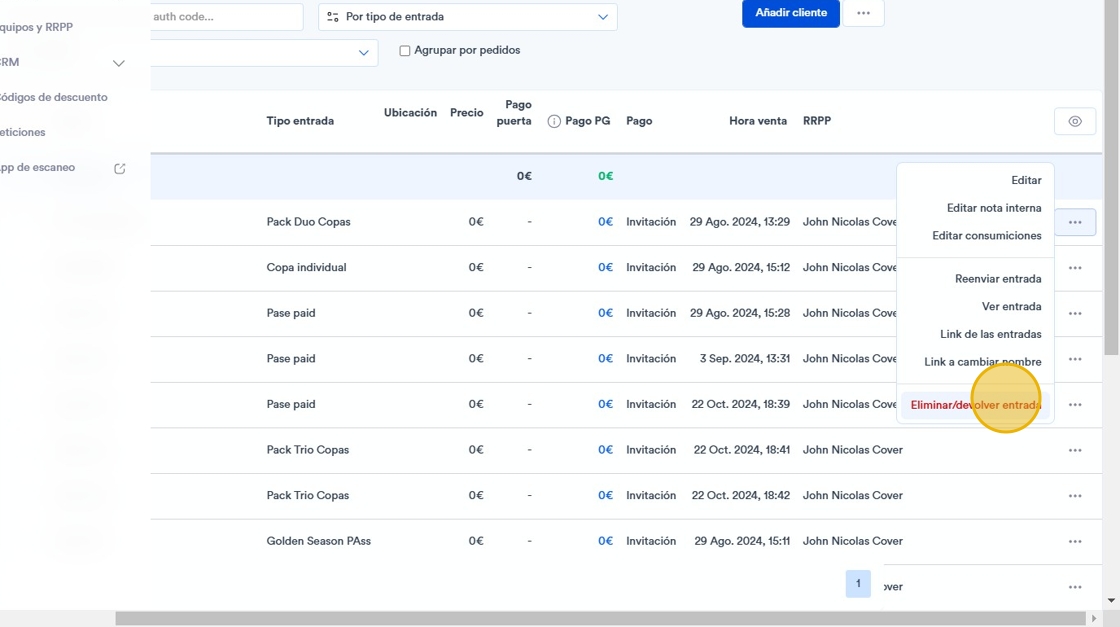
5. A panel will be opened directly to refund the ticket. If it is a cancellation WITHOUT economic refund, you only have to CANCEL the ticket.

6. Once it is confirmed that the customer wishes to cancel the ticket, the customer will receive an automatic email confirming the cancellation, and the refund of the ticket will be sent to the customer's account within 72hs, depending on the bank.