
This guide is essential for those looking to manage and sell event tickets with PremiumGuest. It provides clear steps for creating, editing and managing different types of tickets, adjusting prices and availability according to the needs of the event. In addition, it offers customization and status management options that facilitate sales and access for customers.
1. To access the tickets screen click on events.

2. Click on the event you want to select to create entries and edit them.

3. Click "Add ticket".

4. Ticket type: Select the type of service you want to add.

5. Establish the price of the service.

6. Indicates the quantity of tickets for sale and the limit number to purchase.

7. Order: Indicate the position (1, 2, 3...) in which it will appear in the list of services on the web, depending on the order in which you want them to appear.
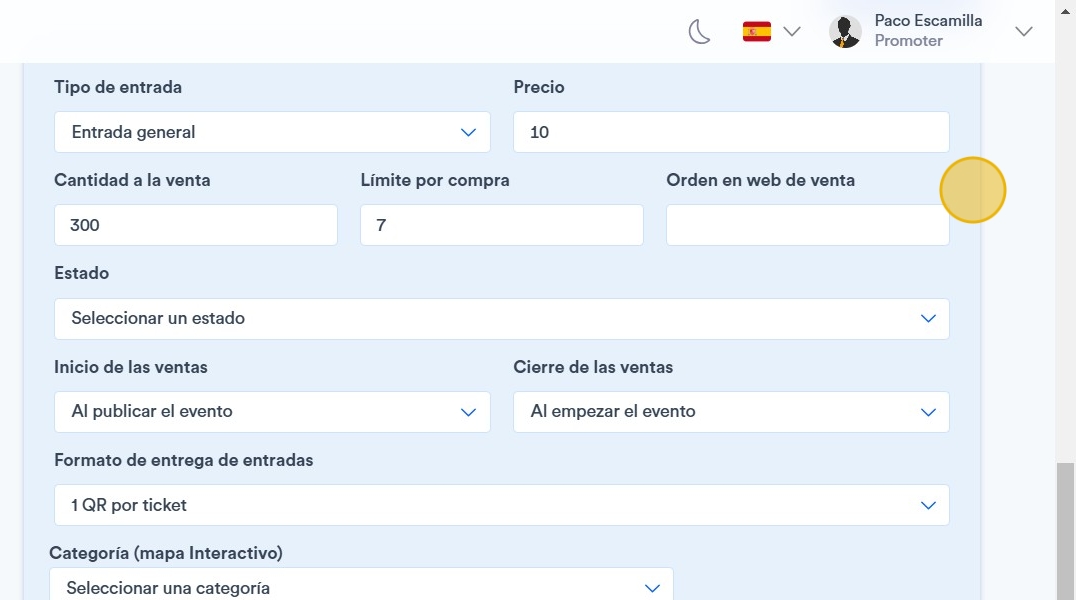
8. Status:
- On sale: The service will be displayed on the sales website and customers will be able to purchase.
- Private sale: The service will be created within the management platform, but will not be visible on the sales website. This way, you will be able to publish it later or, in case of an exclusive event, share it privately with your guests. To extract the link, simply add “?service_id=” followed by the service code to the event URL.
- On request: The service and the price will be displayed, but the customer will not be able to buy it directly, he/she will have to request permission to purchase it. This request will be sent to you by e-mail, and you will be able to decide whether to accept or deny it. Sale completed: The service will be displayed as closed within the platform and customers will not be able to buy.
- Sold out: The service will be displayed as depleted on the platform and customers will not be able to buy.

9. Select when you want to have the start of sales available.

10. Deadline: Select the date on which the sale of the service will be closed.

11. Print format: In the case of a customer purchasing 5 tickets, the option of “1 Qr per ticket” will generate 5 different QR codes, one for each attendee. On the other hand, the “Single Qr per purchase” option allows grouping the 5 tickets into a single QR code, thus speeding up access to the event.
It is recommended to select the single ticket option, in case customers arrive separately to the event.

12. Select the category on the interactive map.

13. Finally, add a “Title” to identify the service (i.e.: VIP Table + Bottle). Add also a “Description” (i.e.: VIP Table + Bottle for 4 pax. 100€/person extra).
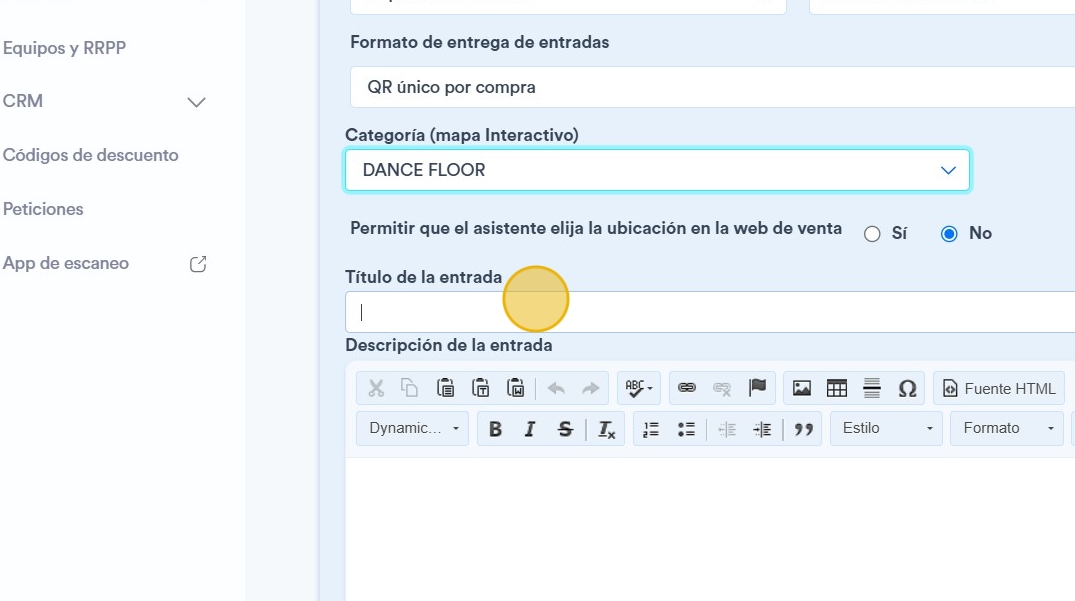
14. If you want to show the customer the option to choose the location of the entries click ¨yes¨.

15. If you want you can customize the payment button.

16. Once you have created the entry it will appear with its statuses, you also have the possibility to edit it.

17. The event countdown will also appear with the sale closing information.
