
This guide is essential for those who want to efficiently manage event promotion by linking groups of promoters and restricting ticket sales. It provides a step-by-step process that simplifies the allocation of permissions and control of promotion, ensuring that resources are used effectively. It also allows you to customize the promotion strategy, adapting it to the specific needs of each event. Viewing this guide will make it easier to organize and maximize the success of any event.
1. Click "Events".

2. Access the event.
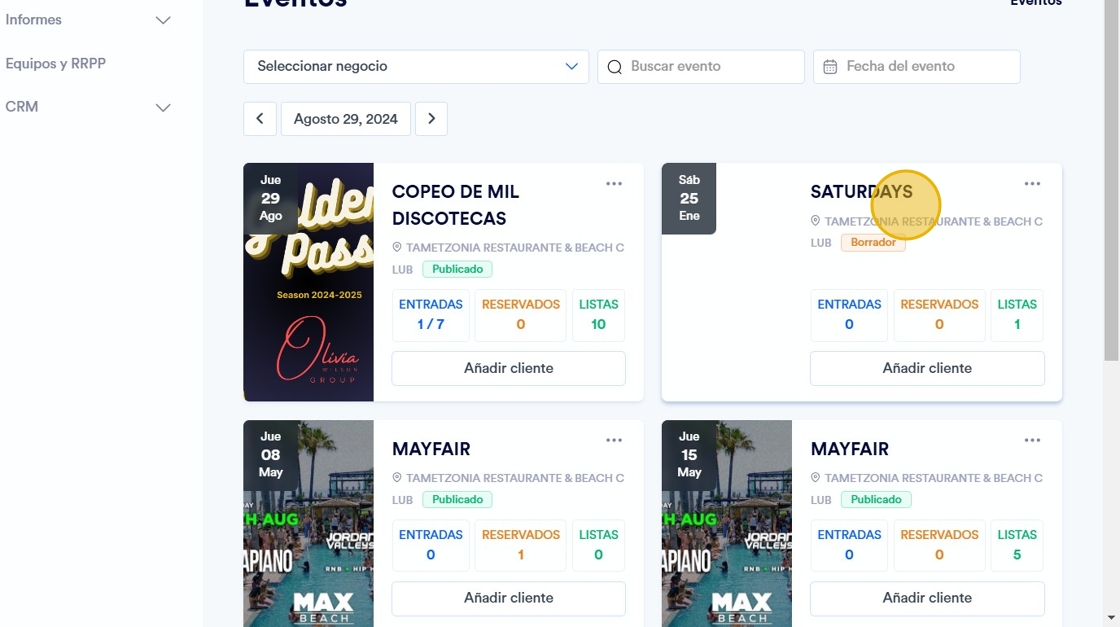
Tip: Link a group of promoters to an event:
3. Click "RRPP"

4. Click “Add equipment”.

5. Select the promotion team you wish to link.
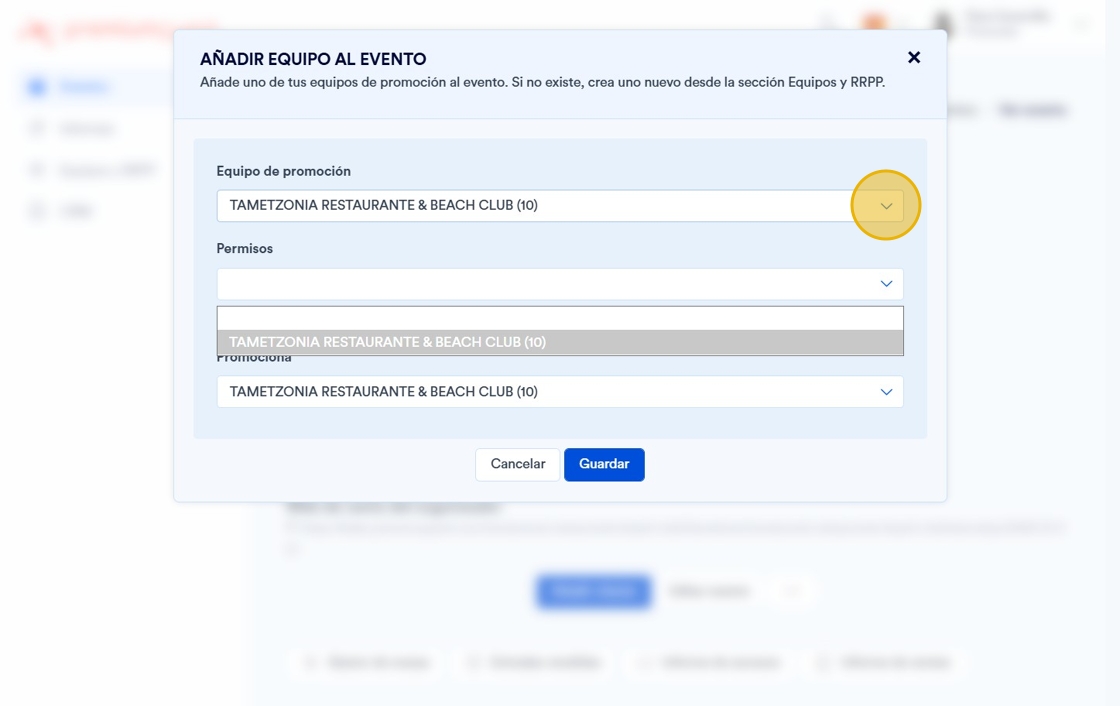
6. Indicates the type of permits they should have (promoter, vendor, controller, gatekeeper or admin).

7. Indicates if it will be for all business events or only for this event.

8. Select the equipment you promote.

9. Click "SAVE".

Tip: To limit the promotion of tickets:
10. Within the event, click on “Tickets”.
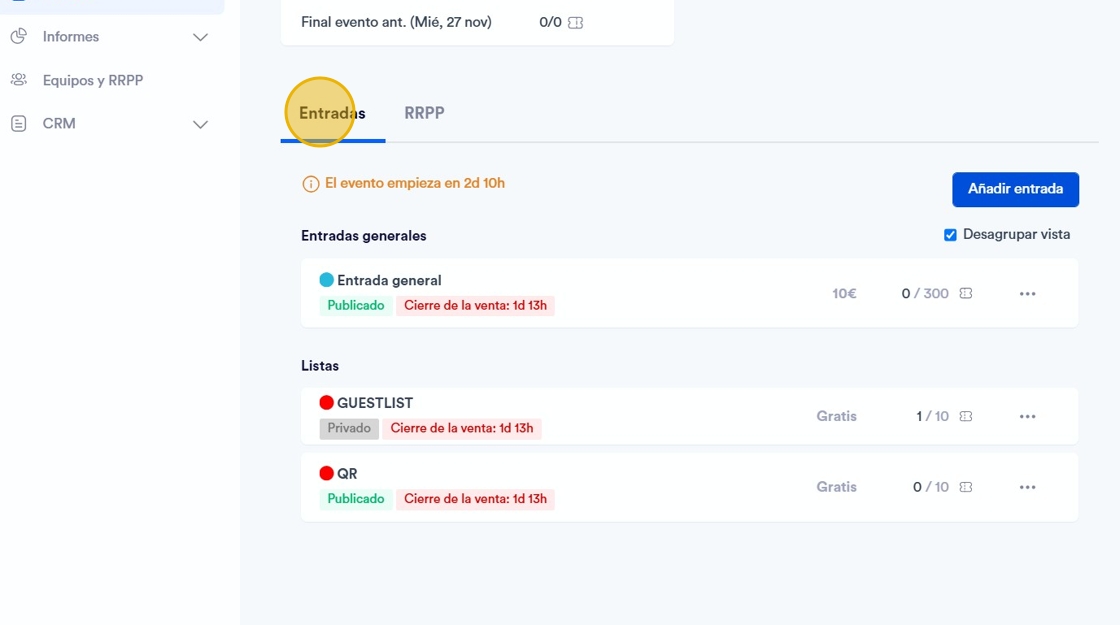
11. Click on the 3 dots icon to the left of the entries.

12. Click “Limit promotion”.

13. Select the group of promoters to whom you want to limit the promotion.

14. Indicates the amount of services they will be able to offer.

15. Click “Limit promotion” when finished.
