
This guide provides a simple process for adding new customers to an event, making it essential for event organizers looking to streamline their customer management. By following the steps outlined, you will be able to efficiently enter customer data, manage ticket types and track payment status, ensuring a seamless experience for both you and your customers.
1. Click "Events".

2. Choose the event for which you want to add a new customer. You can also click directly on “Add customer”.

3. Click “Add customer”.

Customized customer
4. Select the ticket type.

5. Type first name and last name, corresponds to the Customer Contact Information.

6. Select the language: Spanish, English or Catalan will depend on the language you want the customer to receive the entry/s in their email.
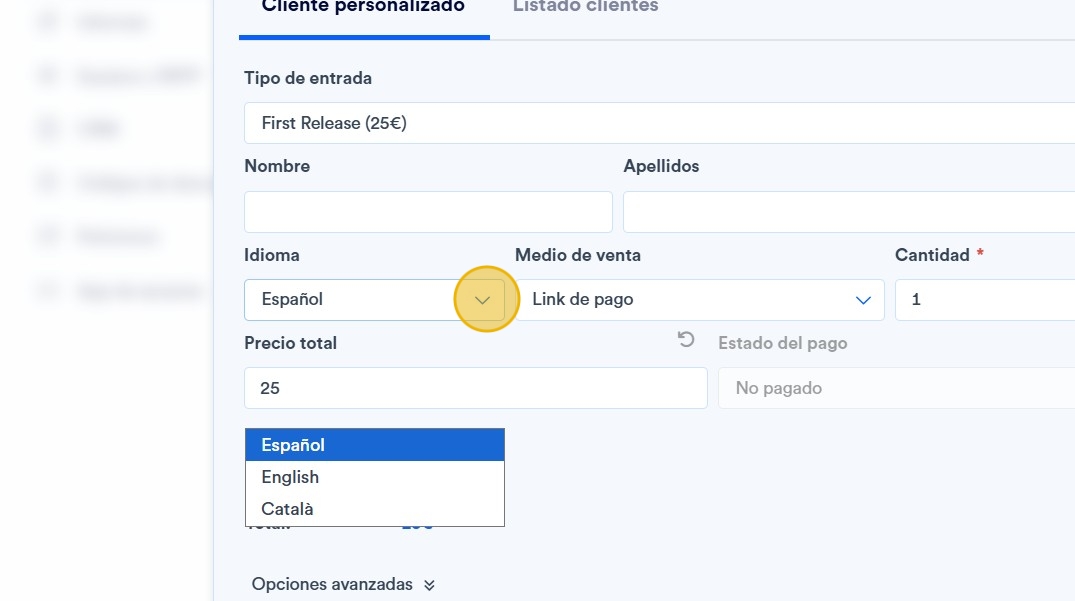
7. Select the means of sale:
Invitation: The ticket is at zero cost.
Payment link: You will receive an email with a link, through which you can pay directly for the ticket without having to enter the sales website.
Cash: You will pay at the place of the event.

8. In quantity, enter the number of tickets or invitations you want to send to that customer.

9. Enter the total price.

10. The payment status indicates whether the service is paid or pending payment.

Tip: If you slide the advanced options drop-down:
11. In this section, you can select the name of the RRPP and the email of the client or guest to send your entry to. You will also have the option to complete additional data, if desired. Once completed, click on “SAVE”.

List of customers
12. Click "List of customers".

13. Finally, it also allows you to add a more general list of people, you only need to enter the name followed by the number of people who will enter with that person. When you have finished, click on “SAVE”:
