This guide is essential for those who want to create and manage events efficiently in PremiumGuest. It offers a clear step-by-step approach covering everything from business and location selection, to customising details such as description, event visibility and age requirements. In addition, it includes recommendations for optimising event promotion, such as the use of images and videos, ensuring that organisers can effectively engage their target audience.
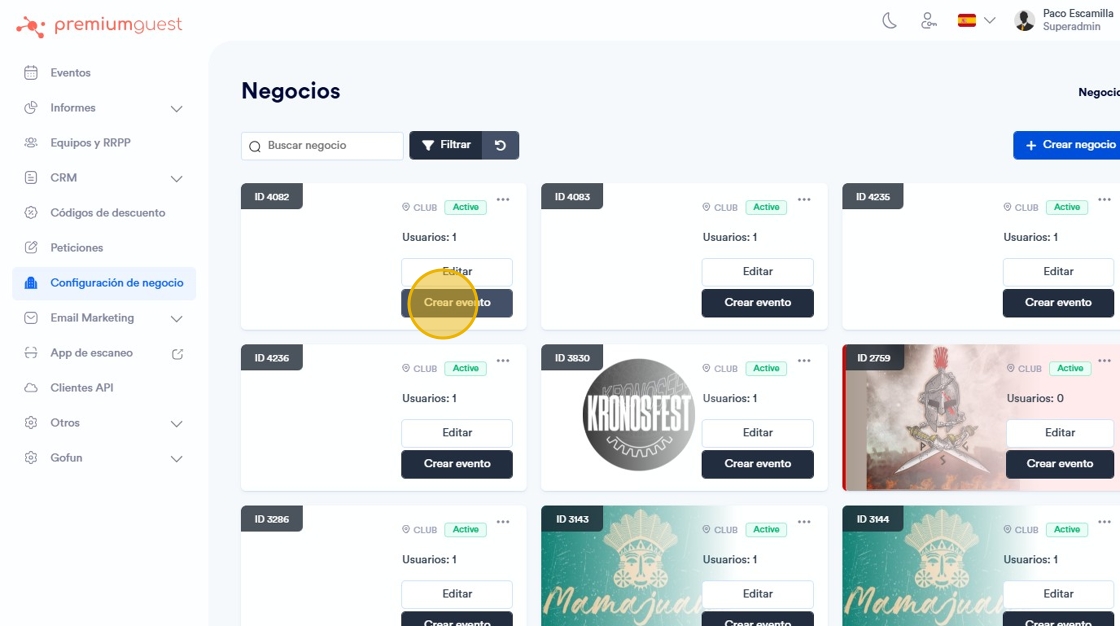
1. Click ‘Create event’.

2. This is the preview for creating an event.

3. Under ‘Business’, select the business you want to create the event with.
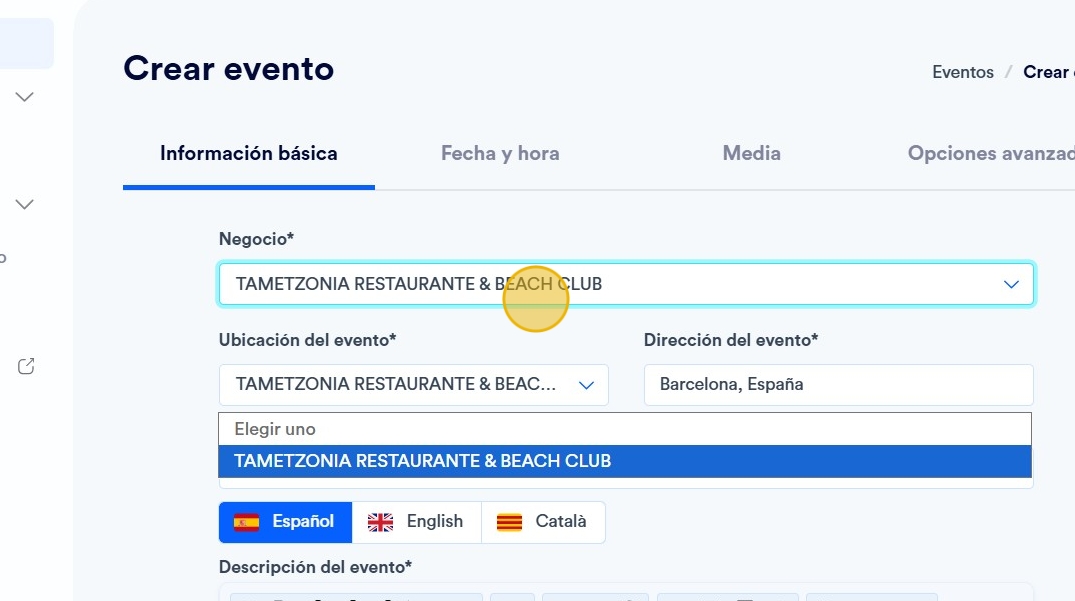
4. Event location**’ and “Event address” to select and add the information of the location where the event will take place.

5. Event location**’ and “Event address” to select and add the information of the location where the event will take place.

6. In "Event description ’ you can add the description of the event that the customer will see on the sales website.

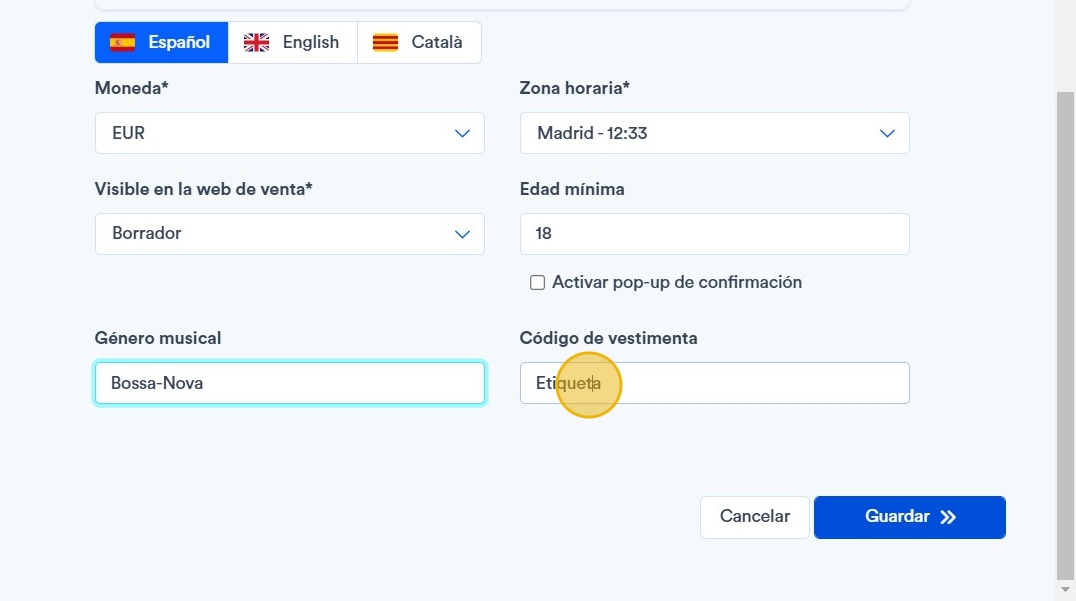
7. Select a coin

8. The ‘Time Zone’ refers to the time of the event location, if it is in Spain, the reference time of Madrid, for example, will be chosen.

9. Under ‘Visible on the sales website’ you will find 5 options:
- ‘Published’: It is active on the sales website and you can make purchases of tickets or added services.
-‘Draft’: This is an idea or event project that has not yet been finalised.
-‘Closed’: The event will remain published on the website, but ticket sales are closed.
-‘Private’: The event is inactive until you decide to publish it on the sales website. ‘Primary": The event does not appear on the website yet, and you will still be able to modify the event sections.

10. Click on ¨Minimum Age’ to specify the age of the attendees at the event.
And in the ‘Activate confirmation pop-up’ box when the buyer enters their details in the form, you will require them to confirm that they meet the minimum age requirement in order to continue with their purchase.

11. Add a particular genre of music to be played at the event if you wish.

12. You can also add the dress code if you wish.
13. The next step is the date and time section.

14. Start of event ‘: Indicates the date and time of the start of the event.

15. End of event ‘: Indicates the date and time of the end of the event.

16. If you want not to be visible on the sales website, you can select the ‘hide end time’ option and indicate "Until late ’.

17. Close of sales ‘: Indicate the date and time at which you want the ticket sales to close.

18. Send by email - sales list": Indicate the date and time you would like to receive the final sales report.
**We recommend scheduling it for 15 minutes after the close of sales.
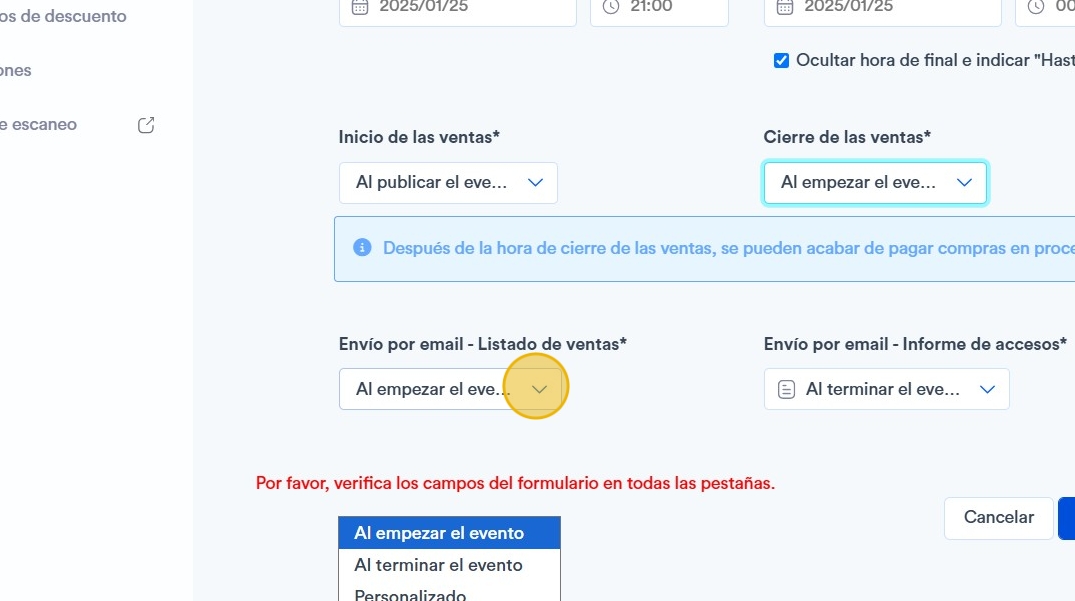
19. Send by email - access report": We recommend scheduling it for 15 minutes after the end of the event. This report will show all the accesses to the event.

20. The next section is ¨media¨.

21. ‘Flyer**": will be the one that will appear as the “front page/header” of the event on the website. The optimal size of this file is 1080x1920px.
In the ‘Gallery’ you will be able to add images of previous events. (We recommend 5 imagess in this section so that they can be seen correctly once the event has been published).
‘The best way to upload the video would be to search for the video in one of these two platforms, in the Share option, choose: Insert, and copy the iframe that appears in the video in the box.
If you choose ‘SoundCloud song’ you only have to add the ID of the song you want to add for the event.

22. Click ‘Advanced options’ to finish configuring the new event.

23. ‘Registration form’ in this section you will find ’Registration data¨ when displayed you have the option to ask only for the purchaser's data, or also for the attendants attending with the purchaser, if for example the tickets were nominative.
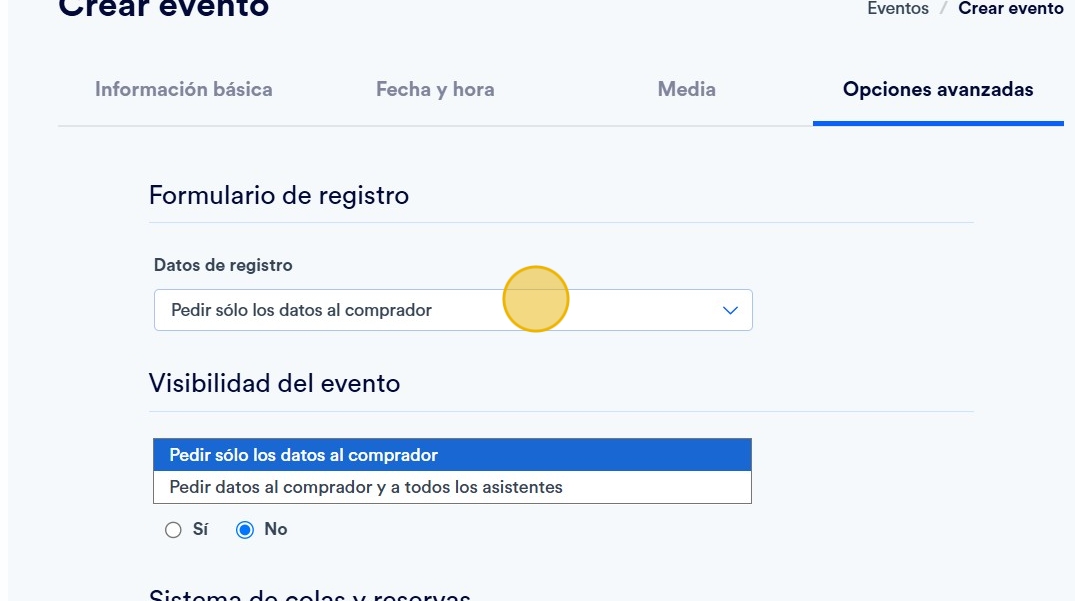
24. ‘Event visibility**’ after the event is over, still visible on the sales website, such as events that have already taken place.

25. ‘URL’ will be the sale link associated with the event.

26. ‘There are two options in this section:
-
The option to ‘show the number of tickets remaining’ as a countdown of the tickets still to sell.
-
The other one would be ‘enable ticket name change’, when a buyer wants to change the name of his ticket for another one, and you charge for it you can enable this option.
(It is best to consult us to inform you of all the steps to follow).

27. Once you have configured the event, you can edit it or add customers. If you want to allow the option to add a full listing click ¨yes¨.
You can also configure if you want to allow cash sales to PRs.

28. POS and drinks: will depend on the type of tickets and services that you will have available for the event (check with the Premiumguest team).

29. Once configured, this is the new event preview.ento.

Tip: Tip! You can also create an event from the business settings screen.
30. Click on ‘Business settings’ and you will find the screen of the different businesses.

31. Click ¨Create event¨.