
This guide provides a complete step-by-step process for creating a business on PremiumGuest, making it easy for users to set up their profiles without omitting important details. It covers everything from entering basic information to advanced options, ensuring that users can fully customise their listings. Consulting this guide will help streamline the setup process, saving time and reducing the likelihood of errors.
1. Click on ‘Business configuration’.

2. Click ‘Create business’.

3. Click on ‘Basic information’.

4. Enter the business name.
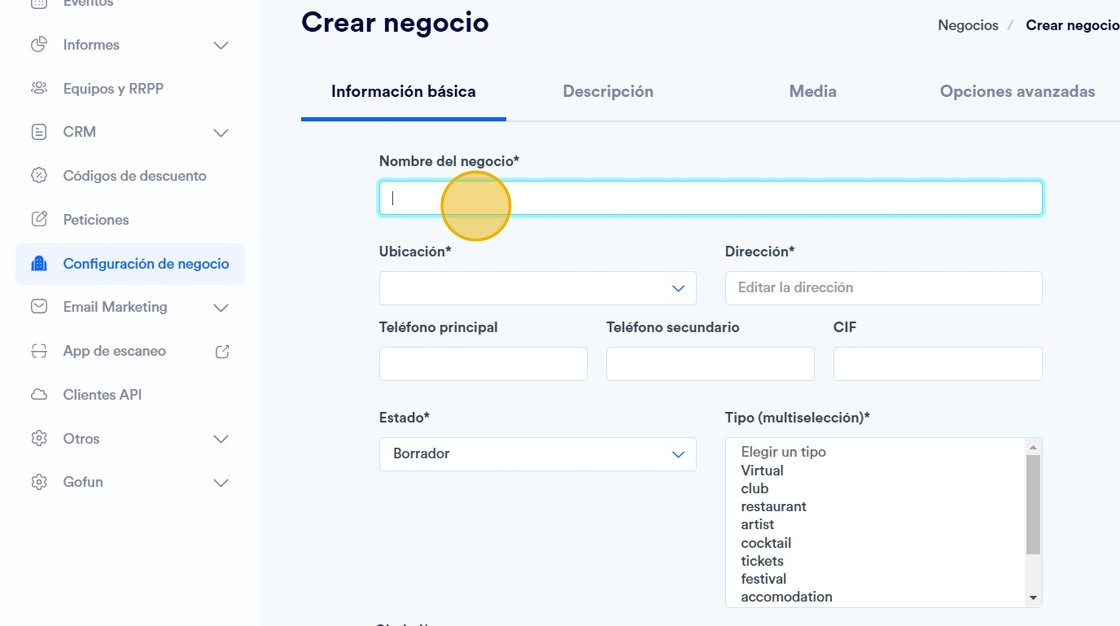
5. Select the location and address of the business.

6. Here you can type:
-Main phone.
-Secondary telephone.
-CIF.
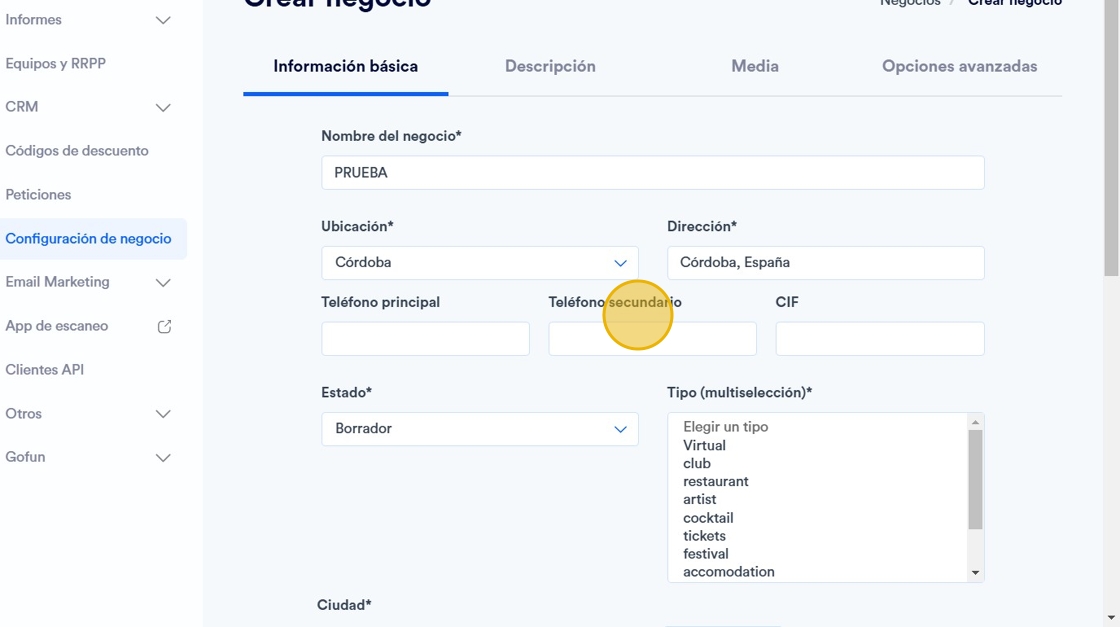
7. Select the state in which you want the business to be located.

8. Select the type of business.

9. Select the city.

10. Indicates whether you want it to be visible or not.

11. Select the ID of the account manager.

12. Enter the commissions for:
-Entries
-Reserved
-Dinners
-Petitions
-Guest List.

13. Click ‘Description’.

14. Here you can write the description of the business in 3 languages.
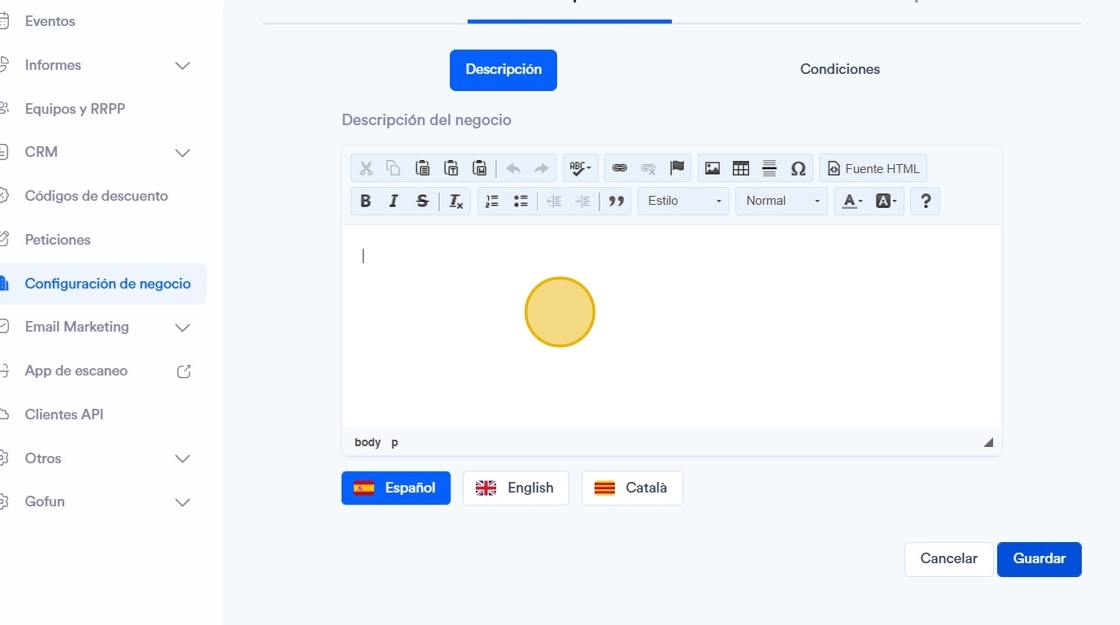
15. Here you can write the conditions of the business in 3 languages.
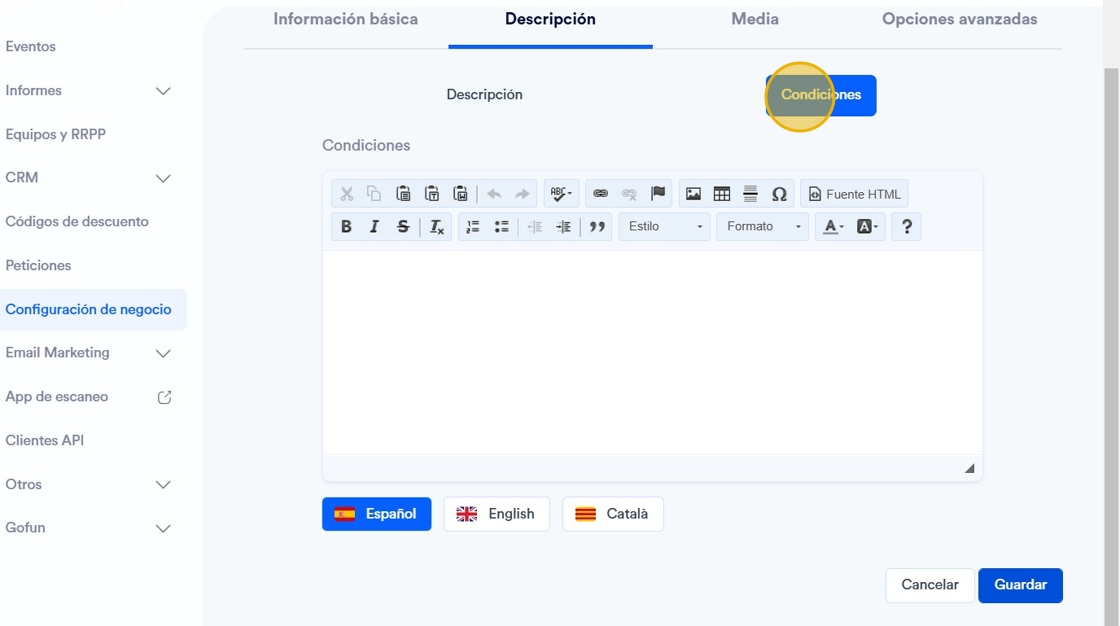
16. Click "Media".

17. Here you can add: logo, business banner, gallery and SoundCloud video ID-.

18. Click ‘Advanced options’.

19. Here you can indicate whether:
-The user with role Door. can see the status of scanned tickets at door or not.
-You can decide whether to integrate with Seatsio and Agora.
-Write the Restaurant Slug of CoverManager

20. Finally, click on ‘Save’.