This guide provides essential information to manage reservations efficiently, allowing users to customize booking limitations according to their facility's needs. By following the steps described, users can set parameters such as maximum and minimum booking times, capacity restrictions and customer eligibility, ensuring an optimized booking process.
1. Click on the “user” icon in the upper right corner and click on “Settings”.

2. Click "Customer experience".

3. Click "Limitations".

Tip: To establish when it can be booked:
4. Select the maximum advance notice with which customers can book (from 1 day to a maximum of 730 days).

5. Select the minimum time to book in days, hours and minutes. Customers will not be able to book with a shorter time than indicated.

6. You can choose to close the web engine at X time of the current day. Some restaurants prefer not to accept last minute reservations, so they choose to close at the beginning of the lunch shift, but keep the option active for dinner reservations.

7. Here you can select the time for lunch.

8. Here you can select the time for dinner.

Tip: What capacity can be reserved for:
9. Select the maximum number of people per reservation.

10. If you select the same maximum number of people per interval in all hours, you will be able to enter the maximum number of people that can book through the web engine at the same hour. Once that number is reached, the engine will automatically close for that hour. (The value 0 allows you to accept the maximum capacity configured in each hour).

11. If you select a different number of people per interval according to the hour, you will be able to enter the maximum number of people that can book through the web engine in each hour and choose the corresponding days of the week.

12. Click “apply capacity”.

13. If you wish to set a maximum number of tables per interval, click on “yes”.

14. Click on “same at all hours” if you want to set the same maximum number of tables for all hours.

15. Enter the maximum number of tables to be reserved by the web engine at the same time, when this number is reached, the web engine will close automatically.

16. You can also select different maximum number of tables according to time.

17. Type the maximum number of tables you wish to set and select the hours to apply.

18. Click on the days you want to apply the settings.

19. Click “Apply table capacity”.

20. This will show the limitations:

Tip: To configure who can book:
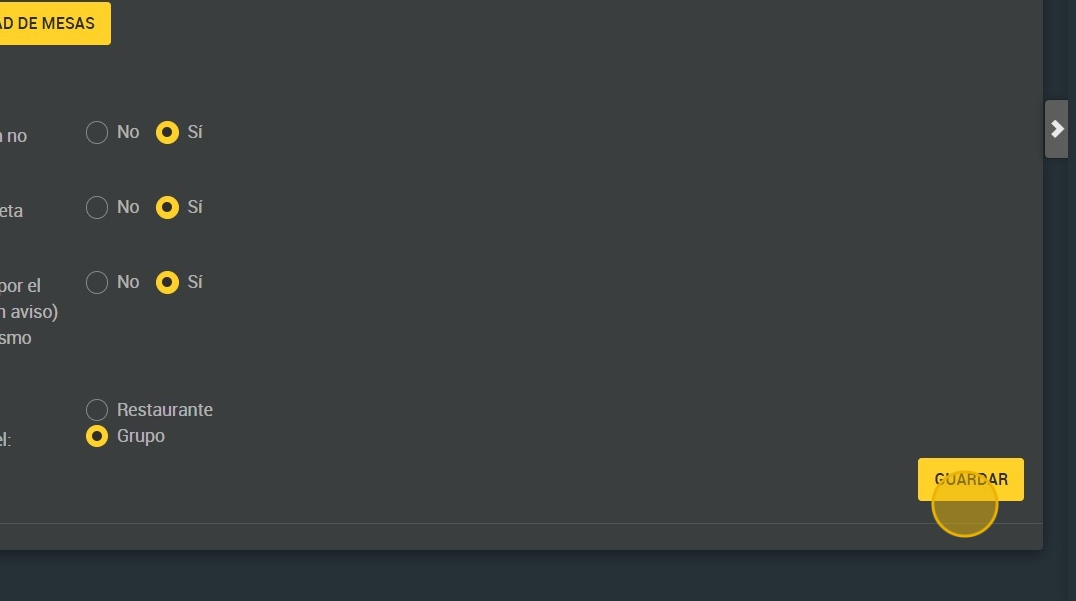
21. Click “yes” to allow customers with a no show (a customer does not show up for a reservation without prior notice) to book through the website.

22. Click “yes” to allow BLIST (blacklisted) customers to book online.

23. Click “yes” to block the client from booking the engine (a warning will be displayed in the software) if he/she has a reservation in the same shift.

24. You can choose to block the customer from booking by searching in the “group” or “restaurant” reservations.

25. Click "SAVE".