
This guide provides a comprehensive overview of how to effectively manage bookings through a Channel Manager, allowing users to customize the configuration to their specific needs. It details options for setting booking limits, adjusting availability for discounts and configuring time variables, ensuring flexibility and control over bookings.
1. Click on the “configuration” icon.

2. Click "Bookings".

3. Click on the day and time you wish to apply the settings.

4. Click "10. Channel Manager".

5. You can choose to set “Change all incoming bookings to pending status” if you wish.

6. You can select the times you wish to receive bookings through this channel.

7. You can select the maximum number of people who can book through that channel. If you do not want to set a limit, enter -1. For example, if you want to allow only 4 bookings through a channel, enter 4; once 4 bookings are reached, it will be closed for that day, but the rest of the channels will continue to receive bookings.
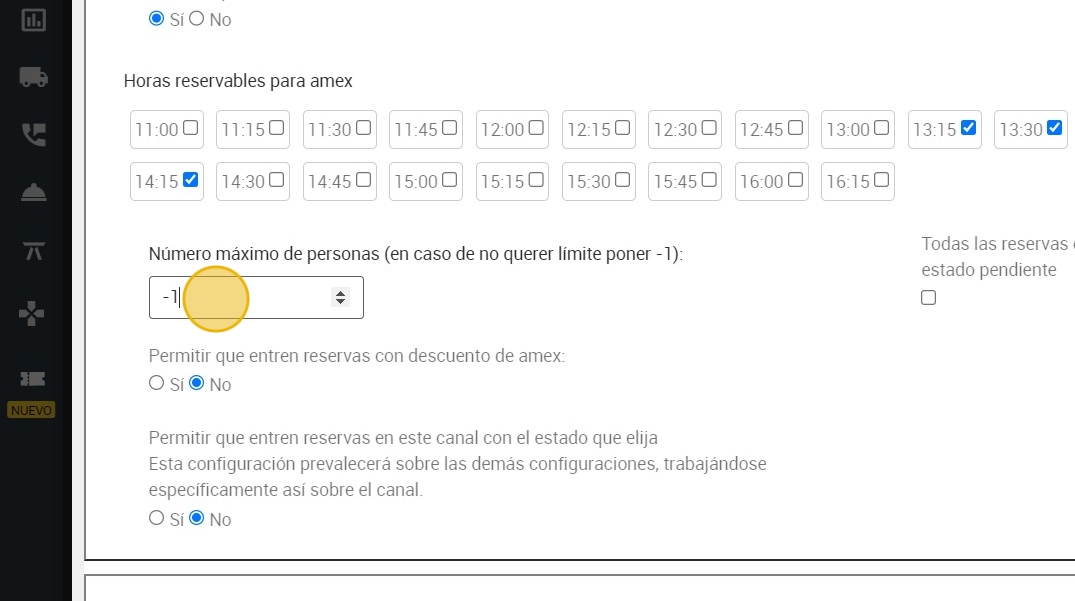
8. You can also decide whether to allow discounted bookings on that channel. If you choose to allow them, you can also select the maximum number of people who can book at a discount.

9. You can also allow reservations to enter this channel with the status of your choice. This configuration will prevail over the other configurations, working specifically on the channel.

10. You can choose between different states.

11. You can also choose between different time variables for the configuration:
A. Same day (today).
B.¨Every Wednesday¨: here you can select one or more days of the week where you want to apply the configuration. For example; Tuesday, Thursday and Friday.
C. "Every day”.
D. Between two dates: for example the configuration is from November 22nd to December 22nd.
E. Specific days.

12. Click "APPLY".
