
This guide provides essential information on how to effectively monitor and analyze your bookings and customer data across multiple channels. By using the My Channel Manager feature, you can easily track your monthly and yearly performance metrics. Also this guide teaches you how to apply Channel Manager on a specific day or specific period and you can even learn how to add channels in CoverManager.
1. Click on the “ChannelManager” icon.
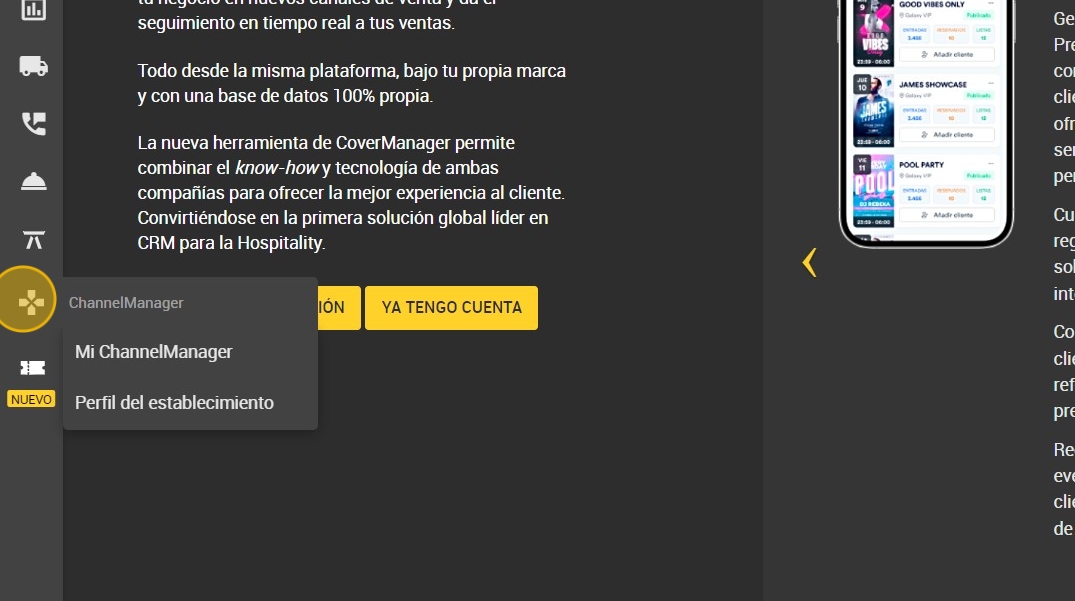
2. Click "My ChannelManager"

3. Here you can check the number of reservations and diners you have received in each of the channels (per month and total for the year). The number of reservations is shown in white, while the number of people is shown in yellow.

Tip: If you want to set up channels such as Facebook and Instagram:
4. Click on the “user” icon in the top right corner and click on “Settings”.

5. Click “Integrations” and ¨ChannelManager¨.

6. Click "yes” to integrate Facebook/Instagram [[Click ]]“yes” to integrate Facebook/Instagram.

7. Click “yes” to activate Facebook.

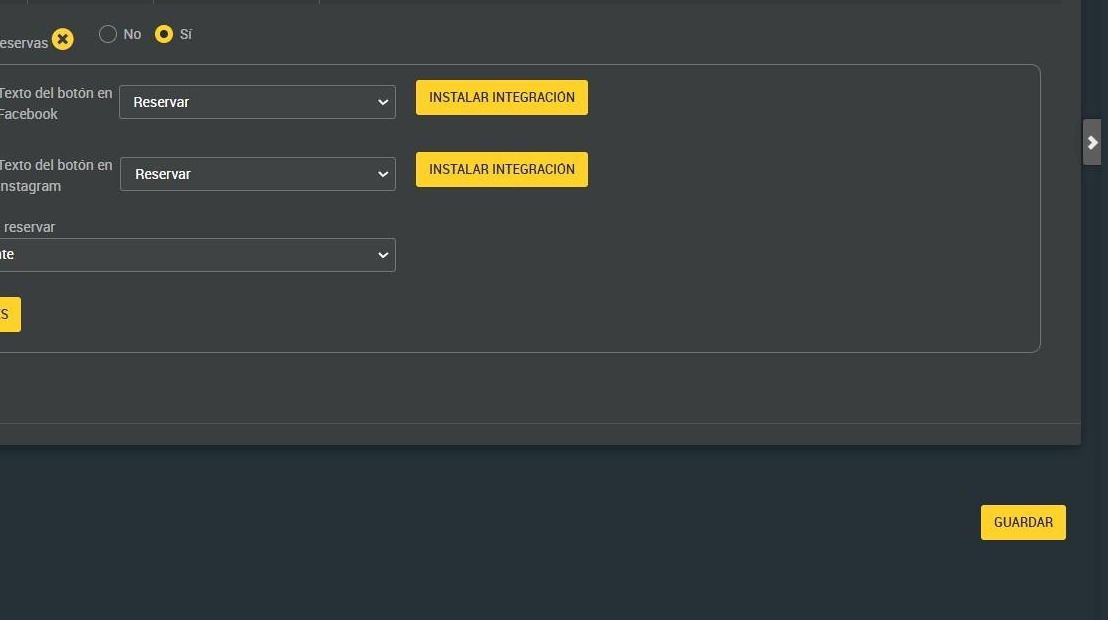
8. Text of the Facebook button.

9. Click “INSTALL INTEGRATION”.

10. Click "YES".

11. If you click ¨yes ¨ for Instagram you can also choose whether to redirect in the integration to book to the restaurant's booking engine or to the group landing.

12. You can also click on “INSTALL BOTH INTEGRATIONS” if you wish to install both.

13. Click “SAVE” and the settings you have applied will be saved.
Tip: If you also want to configure Channel manager customizing schedules and booking requirements, follow these steps.
14. Click “Settings” and ¨reservations¨; select the day where you want to configure Channel Manager.

15. Once you have opened the booking configuration tab, you have point 10. Channel Manager.
Here you can configure specific conditions, days from which the Channel Manager will work or the schedules also where to configure it.
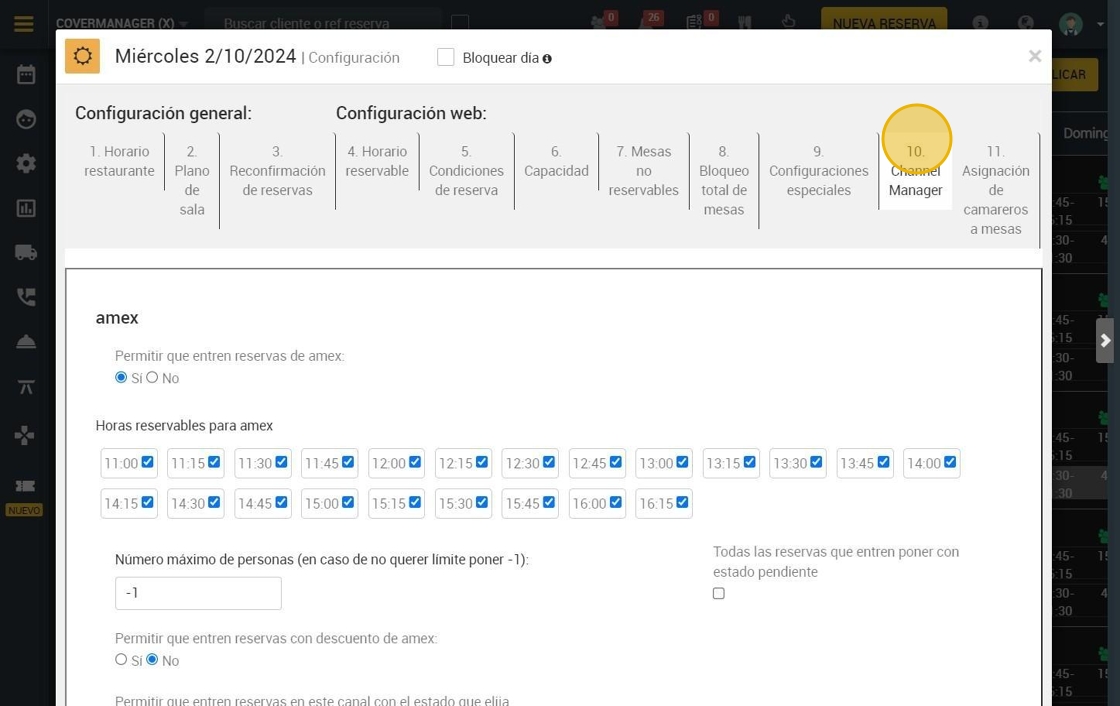
16. You can choose to “All incoming reservations put with pending status” if you wish.

17. You can select the times you want to receive reservations through that channel.

18. You can select the maximum number of people who can book through that channel. If you do not want to set a limit, enter -1. For example, if you want to allow only 4 reservations through a channel, enter 4; once 4 reservations are reached, it will be closed for that day, but the rest of the channels will continue to receive reservations.

19. You can also decide whether to allow discounted bookings on that channel. If you choose to allow them, you will also be able to select the maximum number of people who can book at a discount.

20. You can also allow reservations to enter this channel with the status of your choice. **This setting will override all other settings and will work specifically on the channel.
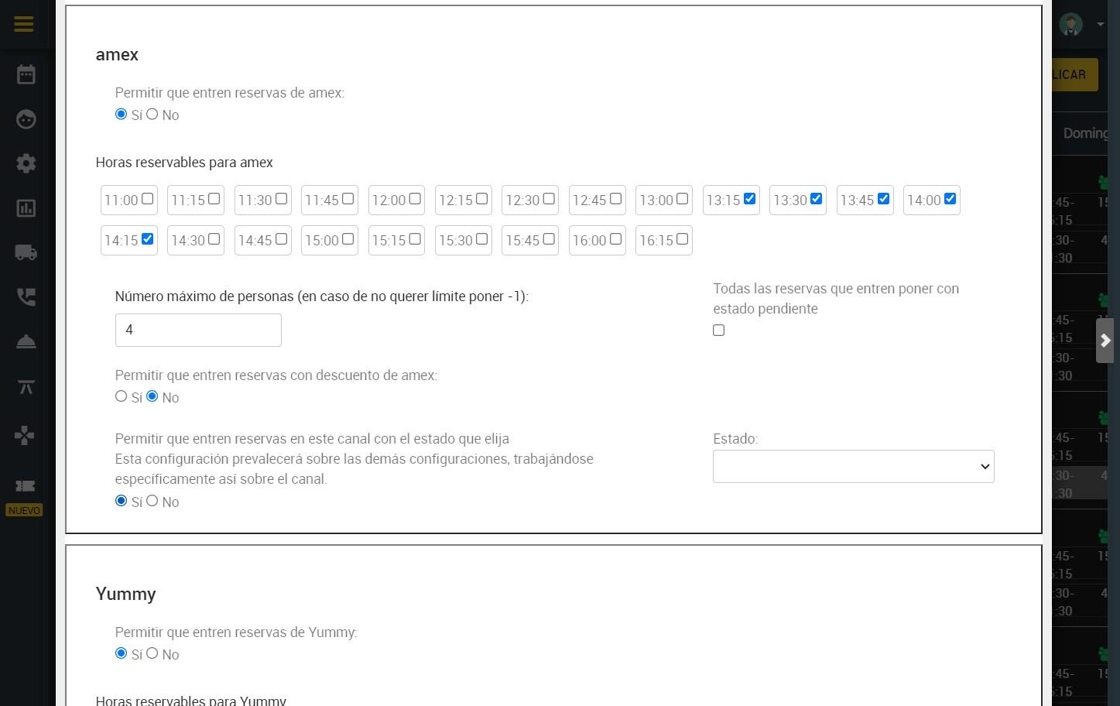
21. You can choose between different states.

22. You can also choose the frequency of this type of reservation, it can be:
A. Same day (today).
B. ¨Every Wednesday¨: here you can select one or more days of the week where you want to apply the configuration. For example; Tuesday, Thursday and Friday.
C. Every day.
D. Between two dates : e.g. the setting is from November 22nd to December 22nd.
E. Specific days.

23. Click "APPLY ” to save the process.
